Up and Down Garage Doors installs and repairs opener header brackets and rail systems across Metro Vancouver, using spreader boards and structural anchoring methods that resist the coastal humidity cycles and seismic movement common to BC housing stock.
Garage Door Header Bracket Mounting
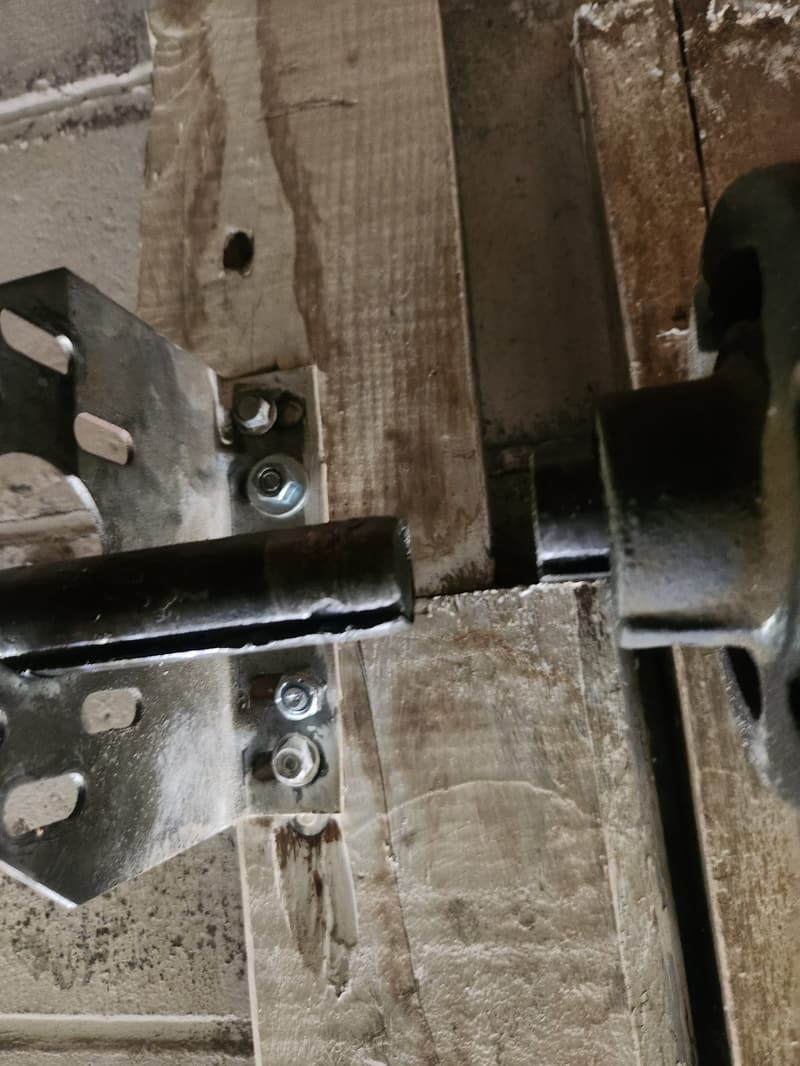
Most Metro Vancouver homes built between the 1960s and 1990s use 2×6 or 2×8 header framing above the garage door opening. The original builder-grade opener brackets often lag-screw directly into the bottom edge of that header — a single 3/8″ lag bolt per side into end-grain or near-end-grain lumber. Over 15–25 years, three factors degrade this connection:
- Seasonal humidity swing: Coastal BC relative humidity cycles from 90%+ in winter to 50% in summer. The header lumber expands and contracts, crushing the wood fibers around the lag threads and creating a loose fit.
- Vibration fatigue: A typical 1/2 HP chain-drive opener (e.g., Chamberlain/LiftMaster 8500W or 85870) generates 60–80 cycles per day. Each cycle loads the bracket with 150–250 lbf of dynamic force at the header connection. The repeated shock load works the lag bolt loose.
- Seismic micro-movement: Metro Vancouver sits on the Cascadia subduction zone. Even sub-perceptible tremors shift the header laterally, shearing the lag bolt hole into an oval.
Result: the header bracket pivots downward, the rail sags 1/4″–1/2″ at the motor end, and the trolley binds or the chain jumps sprocket teeth.
Spreader Board Specification & Installation
What Is a Spreader Board?
A spreader board (also called a mounting board or backer board) is a continuous piece of structural lumber — minimum 2×6, preferably 2×8 — lag-bolted through the header into the wall studs or double top plate, providing a flat, wide bearing surface for the opener header bracket. It distributes the opener’s point load across multiple studs instead of concentrating it on the header’s bottom edge.
Sizing & Fastener Schedule (Standard Trade Practice)
- Board: 2×8 SPF #2 or better, length = header span + 24″ minimum (extends 12″ past each side of the opening).
- Through-bolts to header: 1/2″ diameter carriage bolts or hex-head machine bolts with washers and nuts, spaced 16″ o.c., minimum 4 bolts total. Do not use lag screws here — they pull out of end-grain.
- Lag screws to studs/top plate: 3/8″ × 4″ hot-dip galvanized lag screws with washers, two per stud bay, staggered top/bottom.
- Header bracket to spreader board: 3/8″ × 3″ lag screws with fender washers, 2 per bracket flange (4 total per bracket). Pilot drill 5/16″ clearance for the shank, 1/4″ for the threads.
When the Header Is a Glu-Lam or LVL Beam
Newer builds (post-2010) in Richmond, Burnaby, and Surrey often use 3-1/2″ or 5-1/2″ LVL headers. The same spreader board applies, but through-bolt the spreader board to the LVL using 1/2″ × 8″ structural screws (e.g., Simpson Strong-Drive SDWS) at 12″ o.c. — LVL edge distance rules require 1-1/2″ minimum from bolt center to board edge.
Rail Mounting & Sag Prevention
Rail-to-Bracket Connection Hardware
The rail (typically 1-1/2″ × 1-1/2″ 14-gauge galvanized steel C-channel for residential chain/belt drives) attaches to the header bracket via a clevis pin or bolted angle bracket. Standard hardware:
- Clevis pin: 3/8″ diameter, Grade 5, with cotter pin or hitch pin clip.
- Angle bracket bolts: 3/8″–16 × 1-1/4″ carriage bolts with nylock nuts.
Mid-Span Support Requirement
For doors wider than 16′ (common on double-car garages in South Vancouver, Tsawwassen, and White Rock), the rail requires a mid-span hanger. Use a 12-gauge galvanized steel strap (1-1/4″ wide) from the rail’s top flange to a ceiling joist or blocking, tensioned to remove 1/8″ of sag. Fasten with #10 × 1-1/2″ structural screws into joist — not drywall screws.
Chain/Belt Tension Spec
After rail is anchored, set chain/belt tension to 1/2″–3/4″ deflection at mid-span under 10 lbf finger pressure. Over-tensioning loads the header bracket axially; under-tensioning causes chain slap and sprocket wear.
Component Specifications — Standard Trade Knowledge
| Component | Typical Spec | Notes |
|---|---|---|
| Header bracket (steel) | 12-gauge (0.105″) hot-dip galvanized | LiftMaster 41A5236 / Chamberlain 41A5236 equivalent |
| Rail C-channel | 14-gauge (0.075″) galvanized, 1-1/2″ × 1-1/2″ | 3-piece or 4-piece sectional, 7′–10′ total |
| Trolley carriage | Nylon rollers, 1-1/4″ OD × 3/8″ ID, sealed ball bearing | Cycle rating: 25,000–50,000 cycles |
| Chain | #41 roller chain, 1/2″ pitch, 0.306″ roller diameter | Tensile strength ~2,000 lbf |
| Belt (belt-drive models) | Polyurethane with steel tensile cords, 1/2″ pitch | Cycle rating: 50,000+ cycles |
| Sprocket (motor end) | 12-tooth, 5/8″ bore, hardened steel | Matches #41 chain |
| Idler sprocket (header bracket) | 12-tooth, 3/8″ bolt-on, needle bearing | Lubricate annually with PTFE spray |
Common Failure Modes We See in BC
1. Lag Bolt Pull-Out from Header End-Grain
Original installer used 3/8″ × 2-1/2″ lag screws into the header’s bottom face. After 10 years of humidity cycling, the wood fibers crush and the bolt spins freely. Fix: install spreader board per above.
2. Rail Sag at Motor End — 1/2″+ Deflection
Caused by missing mid-span hanger on 18′ wide doors, or spreader board not through-bolted to header. The rail’s own weight (≈8 lb/ft) plus chain tension creates a permanent catenary curve.
3. Header Bracket Flange Deformation
12-gauge bracket flanges bend upward when the opener’s torque reaction (≈15 ft-lb on 1/2 HP units) loads the bracket eccentrically. Reinforce with a 1/4″ × 2″ × 6″ steel plate welded or bolted to the bracket’s vertical web.
4. Clevis Pin Wallow-Out
The 3/8″ clevis pin hole in the rail’s end bracket elongates to 1/2″+ from dynamic loading. Replace rail end bracket (LiftMaster 41A5237) and use a 3/8″ Grade 8 bolt with nylock nut instead of clevis pin for permanent fix.
Installation Sequence — Field Protocol
- Remove existing header bracket. Inspect header for rot, splits, or previous fastener damage.
- Cut spreader board to length. Mark stud locations through header using a 1/2″ spade bit pilot.
- Through-bolt spreader board to header (4× 1/2″ carriage bolts). Lag-screw to studs/top plate (3/8″ × 4″ lags, 2 per bay).
- Mount header bracket to spreader board (4× 3/8″ × 3″ lags with fender washers). Level bracket within 1/16″.
- Assemble rail sections. Verify straightness — no more than 1/8″ bow over 10′.
- Attach rail to header bracket (clevis pin or bolted angle). Install mid-span hanger if door >16′ wide.
- Hang motor unit. Set chain/belt tension. Run 5 full cycles, re-check bracket fasteners for movement.
- Torque all lag bolts to 25 ft-lb (3/8″) or 50 ft-lb (1/2″). Mark with paint pen for future inspection.
FAQ
Can I just use longer lag screws into the existing header?
No. Longer lags in end-grain do not increase withdrawal capacity — they just engage more deteriorated wood. The header’s bottom edge lacks the fiber density to hold. A spreader board transfers load to studs in side-grain, which has 3–4× the withdrawal resistance.
Is a 2×6 spreader board enough for a 16′ door?
2×6 works for single-car doors up to 10′ wide. For 16′+ double doors, use 2×8 or double 2×6 laminated with construction adhesive and 3″ structural screws at 8″ o.c. The deeper section resists bending from the opener’s torque reaction.
What about mounting to a steel lintel in a commercial building?
Use 1/2″ diameter through-bolts with oversized washers and lock nuts through the steel lintel’s vertical leg. Do not weld — heat damages the opener bracket’s galvanizing and creates brittle zones. If the lintel is hollow structural section (HSS), use through-bolts with backing plates inside the tube.
How often should the header bracket fasteners be re-torqued?
Inspect annually. In Metro Vancouver’s climate, re-torque at year 1, year 3, then every 2 years. Temperature/humidity cycling loosens fasteners predictably. A 1/4-turn looseness on a 3/8″ lag indicates wood fiber crushing — plan spreader board retrofit within 6 months.
Does rail sag affect the safety reversal system?
Yes. A sagged rail changes the door’s travel geometry. The trolley may not engage the down-limit switch at the same floor contact point, causing the door to stop 1″–2″ short or over-travel and trigger the force reversal prematurely. This looks like a “sensor issue” but is mechanical.
Can I install a jackshaft (wall-mount) opener to avoid header mounting?
Jackshaft openers (LiftMaster 8500W, 85870