Services
Locations
📞 (778) 873-7282
Home / Blog / How to Tighten Garage Door Weather Seal Hardware

How to Tighten Garage Door Weather Seal Hardware

Learn how to inspect and tighten loose hardware on your garage door weather seal. Identify wear, avoid damage, and know when to call a pro for safe repairs.

Call (778) 873-7282
Licensed & insured
Open 24 hours
Based in Richmond
5-star rated

Garage door weather seals loosen over time due to vibration, temperature cycling, and repeated door movement. The retainer fasteners that hold the seal in place gradually work loose, allowing the vinyl or rubber strip to flap, tear, or pull away from the door jamb. This creates gaps that let in drafts, moisture, and pests, reducing energy efficiency and potentially causing water damage. You’ll notice it by a rattling sound when the door closes, visible gaps along the bottom or sides, or the seal appearing bunched or detached. Start by inspecting the seal along the bottom, top, and sides of the door. Look for missing or stripped screws, bent retainer tracks, or sections where the seal has pulled free. Use a flashlight to check the underside of the bottom seal while the door is closed—any light showing through means the seal isn’t making full contact. For bottom seals, the retainer is typically an aluminum or vinyl track screwed to the door panel. For side and top seals, it’s often a kerf-mounted strip pressed into a groove in the jamb. Tightening involves securing the retainer, not stretching the seal itself. If the retainer screws are loose, use a screwdriver or nut driver to turn them clockwise until snug—do not overtighten, as this can strip the hole in thin metal or crack vinyl. If a screw spins freely, the hole is stripped; remove it, insert a wooden toothpick or matchstick coated in wood glue, let it dry, then reinsert a slightly larger screw. For side seals pressed into a jamb groove, check if the kerf is damaged or if the seal has shrunk and pulled out—this often requires replacing the seal, not just tightening. Never attempt to adjust or tighten anything near the torsion spring system, including the spring shaft, cable drums, or bottom bracket bolts. These components are under extreme tension and can cause serious injury if mishandled. If the door binds, shakes violently, or won’t stay open/closed after your adjustments, stop and contact a technician. Weather seal hardware is a DIY-friendly maintenance task when limited to surface fasteners and retainer tracks. However, if the door frame is rotted, the seal retainer is corroded beyond repair, or you’re unsure about the condition of the lifting mechanism, professional inspection is recommended. Regular lubrication of hinges, rollers, and tracks with a silicone-based spray helps reduce vibration that loosens hardware over time. Check your weather seal every six months, especially before winter and rainy seasons, to maintain a tight seal and extend the life of your door system.

Tools and Materials Needed
You’ll need a screwdriver set (flathead and Phillips), a nut driver or socket wrench for hex-head screws, a flashlight, and replacement screws if the originals are stripped. Keep a small container handy for loose fasteners. For stripped holes, have wooden toothpicks or matchsticks and carpenter’s glue on hand. A utility knife helps trim frayed seal ends, but only if you’re replacing the seal entirely. Avoid using WD-40 on seals—it degrades rubber and vinyl. Instead, use a silicone lubricant if the seal sticks in the retainer, but never lubricate the sealing surface itself, as it attracts dirt and reduces effectiveness.
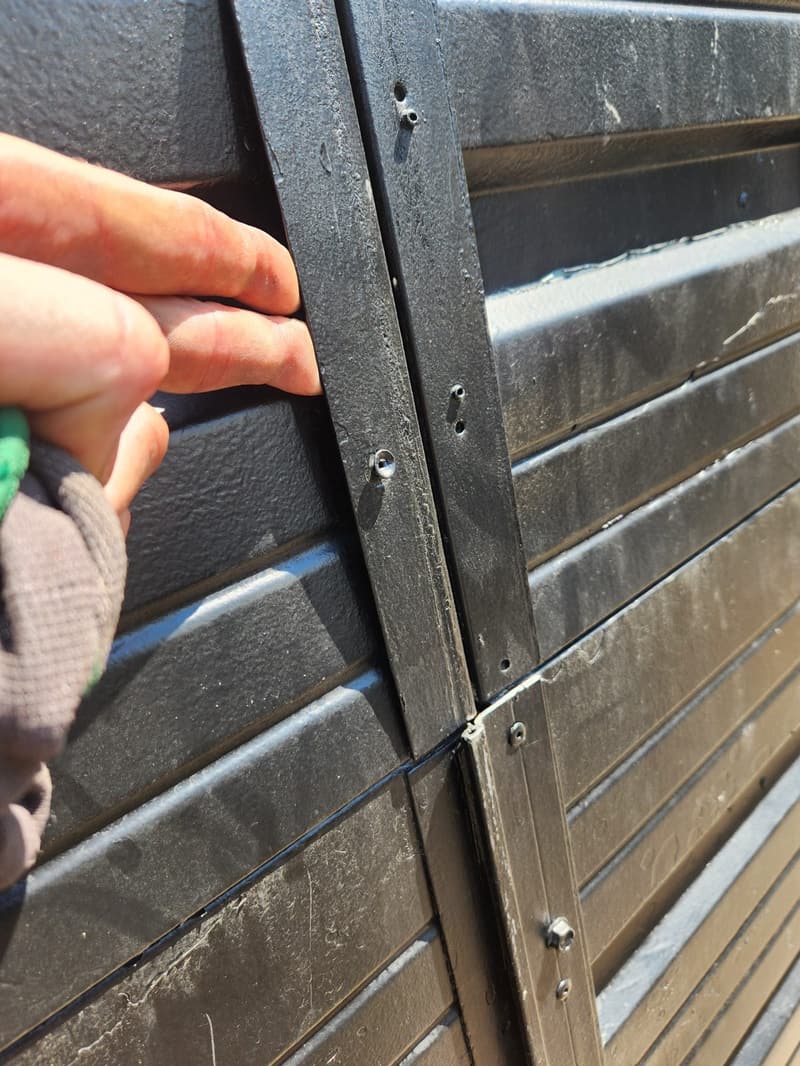
garage door panel and fastener repair
Garage door panel and fastener repair.

Checking the Bottom Seal Retainer
Close the door and examine the bottom edge. The retainer is usually a U-shaped or T-shaped aluminum or vinyl channel screwed to the door panel. Look for gaps between the retainer and the door, or where the seal has pulled out of the channel. Tighten each screw along the retainer, starting from the center and working outward to prevent warping. If the retainer is bent or corroded, it may not hold the seal properly even when tightened—this requires replacement. Listen for flapping when the door operates; a loose retainer causes the seal to vibrate and wear prematurely.

Inspecting Side and Top Weather Stripping
Side and top seals are often pressed into a kerf (a slot) cut into the door jamb. Over time, the seal can shrink, harden, or pull out of the groove, especially in direct sunlight or extreme cold. Check if the seal is seated fully along its length—any gaps mean air leakage. You can’t tighten a kerf-mounted seal like a screw-fastened one; instead, you reseat it by pushing it firmly into the groove. If it won’t stay, the seal may need replacing due to compression set or damage. Never force a seal into a damaged kerf—repair the jamb first if it’s split or rotted.

When Tightening Isn’t Enough
If the seal is cracked, hardened, or permanently deformed, tightening hardware won’t restore its sealing ability. Vinyl becomes brittle with UV exposure; rubber cracks from ozone and age. Test flexibility by bending a section—if it doesn’t return to shape or feels stiff, replace it. Also check for mold or mildew buildup, which indicates long-term moisture intrusion and may mean the seal has been failing for some time. In strata buildings, shared walls and ceilings can transfer moisture, making side seals more prone to degradation than in detached homes.

Safety: What Not to Touch
Never loosen or tighten the bolts securing the bottom bracket to the door if torsion springs are present—these anchor the lift cables and are under immense torque. Similarly, avoid adjusting the set screws on the cable drums or the spring itself. If your door has extension springs (mounted above the horizontal tracks), do not tamper with the safety cables or pulley bolts. These systems store energy that can release suddenly. If you’re unsure whether your door uses torsion or extension springs, assume it’s under tension and leave spring-related hardware alone. A professional can assess and adjust spring tension safely using proper winding bars.

Maintenance Tips to Prevent Loosening
Lubricate hinges, rollers, and pivot points with a silicone-based lubricant every six months—avoid grease, which attracts dust. Clean the seal retainer and jamb groove with a damp cloth to remove debris that prevents proper seating. In coastal areas of Metro Vancouver, rinse salt residue from the door bottom monthly to prevent corrosion of aluminum retainers. After storms, check for debris lodged in the seal that could cause tearing or premature wear.

Frequently Asked Questions
### How often should I check my garage door weather seal?
Inspect the seal at least twice a year—before winter and before the rainy season. Look for cracks, gaps, or sections that have pulled away. Listen for noise during operation, as a flapping seal often indicates loose hardware or material fatigue.

Can I use longer screws to fix stripped holes in the retainer?
Only if the hole isn’t near the edge of the retainer or door panel—using a longer screw risks splitting thin metal or vinyl. For stripped holes, the toothpick-and-glue method is safer and more effective. If the retainer material is too degraded, replace it rather than risk further damage.

Is it normal for the weather seal to stick to the door or jamb in cold weather?
Light sticking can occur when moisture freezes the seal to the surface, but it should release gently when the door operates. If significant force is needed to break the seal free, or if it tears when released, the seal may be degraded or the lubricant ineffective. Avoid pouring hot water on frozen seals—it can cause thermal shock and cracking.

Stuck door? Let's get it moving.

One call, a clear price, and the job done right — 24/7 across Metro Vancouver.

📞 Call (778) 873-7282